Tuesday, March 23, 2010

Betta Study Buddies


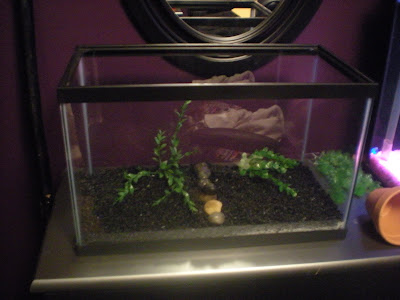
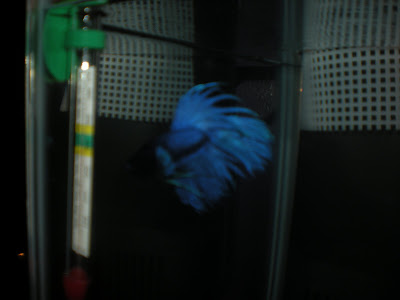
Quinn in his college home.


Although I've had bettas before, I never really took full responsibility for caring for one until I enrolled in college. After one semester, I realize I was glad I got a betta. Now I have two, and two goldfish to boot. (But I play favorites, obviously.) So if you're a college kid looking for a new pet, then consider a betta for the following reasons:

Size: Bettas don't need a lot of room. There are plenty of desktop aquariums that fit perfectly on a desk or nightstand. Because they can breathe air from the surface they don't need a filter either, so long as you perform regular safe water changes.

Cost: Full-sized aquariums can cost a boatload to start and maintain, but effective betta tanks can be set up for less than $50 initially, and then less than $10 a month to maintain.

Ease: College is pretty chaotic, and adding a pet into the mix can be problematic. But bettas are relatively easy to care for. Give regular water changes, feed on a regular basis, and betta maintenance can take as little as an hour a week.

Style: Bettas come in a variety of colors and fin types, so it can be fairly simple to find a betta that will continue to impress you and your lucky roommate. You can even find a betta to match room decor if you look hard enough.

Pet Restrictions: Most college dorms don't allow pets like dogs, cats, rats, gerbils, reptiles, and the like. However, dorms seem pretty lax when it comes to fish. Talk to your dorm manager beforehand, and more than likely, they will agree to let you keep a betta.

Personality: Bettas aren't dogs or cats, but they do develop personalities (or at least we project personalities on them) and can show little quirks to make them even more adorable.

Stress Release: Remember all those science and psychology classes? Well both fields are in agreement that watching fish relieves a fair amount of stress. This can be most helpful during midterms and finals week. Your roommates may appreciate them too.

Of course, as a college kid, you will need to take a few things into account before you get a betta:

Roommates: Make sure your roommates are OK with you keeping a fish. You may need to ask them for feed your pet from time to time, plus it's just courteous. Asking them about it can also help break the ice for new roommates.

Schedule: Schedules can become tangled, gnarled messes, and that's just with classes. Add sports, music, clubs, and visiting home, and you may not have as much time as you think to take care of a betta. Make sure you have the proper time to devote to your pet.

The Dorm: Bettas need a constant temperature to stay healthy. If your dorm room is falling apart (and there are some that are) or if there are a lot of drafts, you may want to either fix it up or reconsider getting a betta.

Planning: You'll probably head back home for holidays and special occassions, but what about your betta? If it's more than a day or two, you may need to ask your roommate, or even take your betta with you. Bettas can be OK with short car travels, but don't make them a common thing.

This is the final Betta Care Guide chapter for a while. I promise!

Your fishy is now swimming happily along in his tank for a while and everything is just peachy. But even with all that hard work, he may still get sick. While prevention is the best medication, it’s even better to be prepared.

First things first: You need a hospital tank. A hospital tank is basically just what it sounds like: A place for you to administer treatments and medications to your fish without compromising the habitat tank. A hospital tank shouldn’t be fancy. A 2 gallon tank with a sponge filter, silk plant, or two, and a thermometer is all you need for a betta. If you have other fish consider getting a 5 or 10 gallon tank instead. You can put a porcelain coffee mug in the tank too if you want to give your betta a place to hide. The hospital tank is meant to be temporary, and the less objects that suck up the medication, the better.


Once you have a good hospital tank set up, you should have a few good general medications on hand. Some of the few I recommend are:

Aquarium Salt - Your fish may be freshwater, but when properly dosed, aquarium salt is one of the best tonics you can use. It boosts your betta’s ability to fight infections and parasites. Buy a small carton of this and keep it handy. You’d be amazing at the wonders it can do.

Melafix/Pimafix/Bettafix - These organic medicines have worked for me in the past, but I think I got lucky. See, Melafix only treats certain kinds of bacteria and fungus. I’ve used it effectively as a treatment for a case of fin rot that Quinn developed in his desktop days. However when dosed with Pimafix for basic wound repair, Melafix/Bettafix works wonderfully. Keep a supply of this nearby.

Anti-Fungal Medication: Keep a bottle of this stuff nearby too. Fungus is a nasty affliction that can bore straight into your fishes body or head, depending on the infected site. Good anti-fungals also promote slime growth to prevent a second infection from taking place.

Ich (White Spot Disease) Cure: This is essential to all aquarium medical supplies. Ich is highly contagious and must be dealt with quickly. Fortunately, ich is fairly easy to combat if you catch it early. A dose of this stuff will kill the parasite when it falls off the fish to breed at the bottom of the tank. The cure usually takes only 24 to 48 hours.

Tetracycline: An all-purpose anti-bacterial, this stuff with fight both internal and external bacterial infections that Melafix may not get.

Epsom Salt: It seems weird, but Epsom salt seems effective in fighting dropsy, a condition that arises from several other diseases, although the condition alone may kill your fish. There are instructions on how to use Epsom salt to combat dropsy on this NippyFish article.

You can see more suggestions for a betta medical kit on this HealthyBetta.com article.


Quinn being acclimated to his new apartment.


Now that your tank is set up, you have food ready, and you have your little guy at home and ready, it's time to put him in the tank.

DON'T TAKE HIM OUT OF THE CUP YET!!!!!

-whew- Ok, before you take him out of the cup and drop him in his new home, there are a few things to do first:

If you have testing kits for pH, ammonia, and nitrates, then do it for the tank and cup, if possible. You're trying to get as close as possible between the two before you toss him in.

Float the cup in the tank for at least 15 to 20 minutes. This will get the temperature close enough that your betta won't fly into shock once he is in the tank. My cups tended to tip and float all over the tank, so I taped it to the side with blue painter's tape.

Next, try to add a little bit of the tank water into the cup so he can slowly get use to the change. Take a little bit of the old water out, and add just as much tank water in. Once you have Most or all new tank water in the cup, float him for 5 more minutes, then either net him or tip him in.

Remember that acclimation is a stressful process, and it will take more time that the few minutes that your betta is floating. Be sure to monitor him for the next few days and watch for signs of weakness or illness, and treat accordingly. Your betta should hide for a minute or two (after all, he was just kicked out of his familiar cup into a strange new home with different water.) He should soon kick into exploratory mode and start examining the tank. Don't be surprised if he attacks his reflection in the glass. Just make sure to watch and see how he fares in the new tank. See if the filter is making too strong of a current for him, or if the intake valve is going to pose a problem.

After a week or so, your betta should be perfectly acclimated to his new home and you can start teaching him tricks. I wish Quinn would do my homework for me once and a while.

If you read my previous post, “Betta Care Guide #2: Building Your Own Tank Setup”, you’ll know what I said makes a good start for a new tank. Well, I just starting doing that last night, so I thought I’d share my progress with you.

First, I got a tank. A ten-gallon tank to be precise. Just a simple rectangular glass tank. My plan is to turn it into a divided betta tank. No, not like the bowl I thrashed in Part 1. Each betta will have 5 gallons to himself, and there will be a plastic mesh divider, which I plan to cross two sheets of plastic mesh so the bettas will not be able to see each other clearly, while still allowing water to flow through, which lets me only have to have one filter and one heater.

Next, I got substrate. Plain black gravel, which I cleaned thoroughly with a sieve and cold water. I laid it in an even layer across the bottom of the tank, and then laid some decorative “river stones” randomly. I left a space for the fish cave to go, and then I put in my plants; plastic plants that passed the pantyhose test. I placed them towards the back of the tank, but left enough room that the bettas can swim behind them.

So far, I left the tank symmetrical, drawing a line down the middle and placing the river stones on top of the line, so I would know where my mesh divider would go.


Next, I got a terracotta pot and sawed it in half with a circular saw. After I soaked them in water and made sure they were safe, I placed both halves into the tank, in the rear corners. These will act as my clever fish caves.


Of course, I forgot about my divider so I had to take everything back out and shove all the gravel to opposite sides of the tank to clear a place. I made the divider out of plastic type “7” knitter’s mesh I got at Wal-Mart for about $3 for 6 sheets. I used some Sliding Bar Report Binders I got at OfficeMax for about the same price for 6 bars. I attached the bars to the glass with clear all-purpose silicone and let it dry for 24 hours before I replaced the gravel and ornaments.


Next I attached the Tetra Heater and the Tetra Whisper Power Filter to the tank.


Next I finished the hood by installing the light bulbs and cutting out the back plastic to allow for easy filter maintenance. Here’s a picture of the tank with the lights off and on. With the lights on, the mesh is lightly reflective, obscuring the other side of the tank even more. At night, the other side of the tank isn’t even visible.


I then added water to the tank using a plate and a 2 quart pitcher. It was a little slow, but it was worth it. I purposefully used colder water (about 60 degrees or so) to see if the heater could indeed heat up the whole tank and keep it steady. I was up just about all night monitoring the progress, waiting for it to plateau. The heater averaged about a 2 degree change per hour, so I was fairly impressed with that change, considering how much energy is needed to heat water, and adding the fact that the thermometer is as far away from the heater as possible. The heater ended up being stable and held the entire tank at about 76 degrees. After acclimating him, I added my betta and released him into his new apartment. I soon realized that the filter output was creating too much current for him to live comfortably, so I moved him to the other side of the divider and built a diffuser out of the same type of mesh as the divider. Now he is swimming happily in his new home. After I was sure the set-up was going to work, I added the second betta to the tank, and he too is perfectly happy in his apartment, and the diffuser works perfectly.


Mr. Quinn Fishy in his new apartment.


Admiral Dagger Fishy is checking out the thermometer in between flaring matches with his reflection. On the right side of the picture, you can see the mesh diffuser we built for the filter.

Finally, we’re at the step you wanted to see. The reason I did the other steps first is because that’s how they should be handled. Set up your tank and supplies, make sure ample food is ready, and that your water parameters are stable. THEN you can focus on picking out a betta.

Now, if you choose to buy your betta from an established breeder, then he/she knows much more than I do and you should listen to their words of advice. And good job on finding and choosing a breeder. =]

But… Most of us don’t have a betta breeder nearby that we are aware of, so we have to go to pet stores. Now, you can follow these simple, basic guidelines:

Choose a Retailer

First things first: There is a difference between a fish store and a pet store. A pet store is any from giant chain stores like PetCo to Petsmart or little family owned shops that deal with all types of animals and supplies. A fish store deals strictly with fish; all kinds of fish, but only fish. Most of the employees at fish stores will know their way around fish and should be happy to help you. If you can go to a fish store, go there first, otherwise your pet stores should be fine.

Before you dive straight for the betta area, wander around the store a little bit and take a look at the other habitats. Are they clean? Are there any dead animals? Are there animals that are showing obvious signs of illness? Are the animals (especially fish) hiding or lurking in corners instead of moving about? (Reptiles are an exception. Reptiles don’t like to move a lot.) See if the store is clean, organized and well stocked. Talk with the employees and see how much they know. Make sure the store is clean and well maintained. If it isn’t, go somewhere else.

Physical Features

Ok, now you’ve moseyed on over to the bettas, and you’re staring at a few dozen bettas that are begging for you to take them home. Now, I doubt you have enough room to take all of the home with you, so you should just settle with the healthiest one for your new betta. I know you feel like you should take the sickest looking one there to take it home and nurse it back to health, but try to squelch that urge.

When looking at the physical features of a betta, look for the following:

Make sure that there are no missing scales, bumps on the body, or open wounds. Check for patches of cottony white growths or white specks over the body. Bring a small flashlight with you, or ask a store employee for one, and aim the light at the betta. If you see what looks like “gold dust” on the body or fins, then avoid that fish, as it has velvet disease.

Check the gills next. Make sure there is no damage to the gills, no major discoloration (a little bit is nothing to worry about, but if the gills have no color, then avoid the fish) If you catch the betta in a flare, then make sure the gills are extended as well. If they stay clamped to the body, that could be a sign of internal damage.

Check the fins now. Make sure there are no broken rays (the little “fingers” that makes the fins flare) and that there are no holes in the fin webbing. If you see little black circles on a non-black betta, then avoid that fish, as it has fin rot. If the container is big enough for the fish to fully flare, that is the best time to examine the fins and gills.

Behavior

Now that you’ve picked out a few fish that look physically fine, now you need to look at how the fish are behaving. A healthy fish will be:

Alert. The second you pass in front of the container, he should react in some way. A twitch is usually enough, and may be the only reaction you get until you look more closely.

Reactive. Pick up the container and see how he reacts then. A healthy fish should spazz out a little bit. Flaring is good, but sulking is bad. Lazy looking fish should be avoided.

Responsive. There are a few ways to test this. One is to see if he will follow your finger across the container. You can also smuggle in a betta pellet and put it in the container to see if he will eat. A responsive fish will eagerly snap up the treat.


We’ve talked about suitable (and unsuitable) homes for bettas, how to build your own betta tank, and the water conditions needed for a happy betta. Now we need to talk about food and feeding. You should have some form of food ready before you bring your little guy home.

Let’s clear this up: Bettas are not goldfish. They have a stomach the size of their eyeball, so if they keep eating, their insides will rupture, and then you’ve got a swollen dead fishy. No matter what the directions on the container says, feeding “whatever your fish can eat within 3 minutes” is a bad idea. One, your betta can’t eat near as much as you think they can. Two, all the uneaten food will dirty the water and slam your filter with an overload.

They are also carnivores, so you need to feed them accordingly. There are several types of food on the market, but we’ll talk about 4: flake, pellet, freeze-dried, and live.

Flake Foods

Flake foods seem perfectly convenient. Everything your betta needs in a simple flake format that keeps fairly well. The only real problem I (and a lot of betta owners) have is that bettas just won’t eat it. They just don’t realize that that shapeless little thing on the top of the water is tasty and delicious. Most bettas are used to either live foods or pellets, since that’s what they’ve been fed throughout their lives. However, if flake foods are the only things offer, sooner or later, they’ll take a nibble out of curiosity and find out they flakes are food. Then you should be ok.

Pellet Foods

This is what most betta owners, including myself, feed as the staple diet for their beloved pets. It’s fairly balanced and easy to manage. It’s best to feed one pellet at a time and never more than 5 pellets. I usually feed my betta once a day at the same time everyday. Of course, man cannot live on bread alone, and fish cannot live on pellets alone…. Well, they can, but it’s very bland. If you use pellets as a staple, then try to break up the monotony with something special, like live or freeze-dried food. I use Aqua-Culture Betta Pellets, although I’d use Hikari Bio-Gold Betta Pellets if I could get a hold of them.


Freeze-Dried Foods


Freeze-dried foods have had a little controversy surrounding them. Some fish owners claim that freeze-dried foods like baby shrimp or bloodworms are simply too “rich” to be fed everyday to a betta. Dozens of betta owners and breeders around the world think that view is ridiculous. How can something be too “rich?” If you had the chance to eat at five star restaurants whenever you wants, you’d probably jump on it. (Though I wouldn’t mind slumming for a hamburger every so often.) In my personal opinion, I’d feed my bettas bloodworms everyday. I usually give Quinn 3 pellets and a good size bloodworm a day, and maybe a smaller worm as a morning snack. Shrimp is another good freeze-dried food that is rich in proteins and tasty for bettas.

Live Foods

Daphnia, live bloodworms, black worms, brine shrimp, and even chopped up crickets and earthworms are all acceptable live foods to feed a betta. Almost all breeders feed their breeding pairs and fry live food, simply because it yields the best results. More radiant colors, better looking body and fins, better immune systems, and more resistant to disease and infection. Of course, live food is a little harder to procure and definitely more expensive, but worth the trouble. However, now large chain stores like PetCo and Petsmart are carrying live food, and for reasonable prices. However, with all live foods, you want to make sure that it is not at risk for carrying disease.


Many people overlook this step because it seems rather simple: Give your betta some water and he’ll be fine. Well, it’s not quite that simple. There are several variables that you need to worry about, but since I realize you all may not be amateur hydrologists, I’ll try to keep it simple. For your betta, the two things you should worry about are temperature, pH level, and water hardness.

Temperature

Temperature is actually very important to bettas. You’ve heard me complain about betta bowls being susceptible to temperature fluctuations because of their size. Which is true. The less water you have, the easier it is to change the temperature. Of course, the opposite is also true. More water = harder to change. Which is why you’ll hear betta owners say that you need more space for a betta than a half-gallon bowl, for more reasons that one, but mostly to control water quality and temperature.

For a betta, temperatures between 74 and 80 degrees (Fahrenheit) are fine. ALWAYS ADJUST TEMPERATURES IN A FISH TANK GRADUALLY. Otherwise you could end up throwing your fish into shock, which is much more lethal to fish than it is to us. Ideally, you want to find a heater with an adjustable thermostat. If you can’t find one, then find a heater that holds a steady temperature within the range for a betta. I’ve got a Tetra Submersible Heater, which holds at a steady 78 degrees. Of course, you should always have a thermometer, which you should place on the opposite side of the tank from the heater. Use one of the floating ones with the suction cups; the ones you stick on the outside glass of the tank aren’t nearly as accurate.

Water Acidity (pH)

Water acidity seems easy to control at first, but if not monitored regularly, it can quickly spin out of control. Water acidity is measured in pH (per Hydrogen), and is easily tested for. In a nutshell, pH measures the amount of hydrogen ions that is diffused in the water on a scale of 1 (the highest) to 14 (the least) Acids, like battery acid and tannins, increase the amount of hydrogen ions while bases, like bleach and liquid pipe cleaner, decreases the number. Now, both extremes are bad. That’s why I’ve always tried to maintain pH levels around 7, which is neutral. Most fish live quite fine between pH levels of 7.5 and 6.5, although some African cichlids live around 8.

For a betta, the water needs to be slightly more acidic, somewhere around 6.8. Most tap water is actually a little more basic than anything. Try to avoid using chemical pH “balancers”, as they actually tend to throw off your pH levels more than anything. But there are some useful things you can do to lower the pH naturally, like:

Filtering the water through peat moss.
Adding some natural bogwood to the tank décor (Make sure you buy the wood from a pet store)
Use a terracotta pot as some décor. (Make sure the terracotta pot has never been used or touched fertilizer.)
Age the water before you use it (which you should do anyway.)

Water Hardness

Water hardness indirectly ties in with pH levels. Hardness actually is a measure of the amount of dissolved minerals and substances in the water. More minerals = harder water = higher pH (basic), is the general rule of thumb. Tap water has a lot of dissolved minerals in it, hence it’s higher pH level. Water hardness, however, isn’t nearly as difficult to maintain. Once you age tap water and treat it with your starter chemical, the water hardness should fall to around neutral levels, which your betta won’t even notice.